Local Test Server
1. FlyEnv
All-In-One Full-Stack Environment Management ToolFlyEnv as a Modern XAMPP Replacement for Local WackoWiki Testing
FlyEnv is a lightweight, native (no Docker) local development environment manager for Windows, macOS, and Linux. It serves as a faster, more modular alternative to XAMPP, MAMP, or Laragon. It supports multiple PHP versions (including older ones like 5.6+ needed for compatibility), Nginx/Apache, MySQL/MariaDB, and features like auto custom domains, SSL, and low resource usage.
1.1. Installation
Download the latest version from the official site or GitHub releases: Windows: Use the installer (
macOS:
Linux:
.exe) or portable version. macOS:
brew install flyenv or DMG. Linux:
.deb or .rpm packages available.Temporary Override: Use Zypper with the
--no-gpg-checks flag for a specific installation:sudo zypper install --no-gpg-checks FlyEnv-4.15.3-x64.rpm
Launch FlyEnv. It provides a clean GUI for managing services and sites.
In the settings, disable any modules you don't want to use.
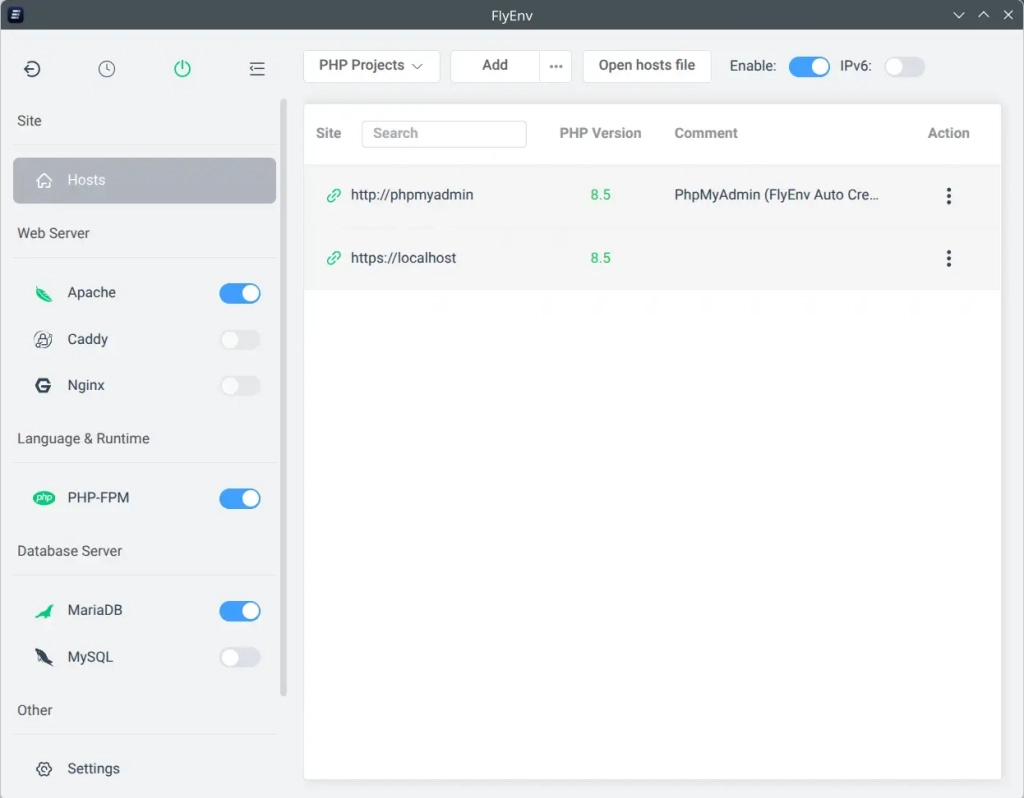
1.2. Setting Up a Local WackoWiki Test Environment
1.2.1. Install Required Modules
In FlyEnv:- - Install a web server (Apache recommended for closest XAMPP parity; Nginx also works well).
- - Install PHP-FPM (choose a version compatible with your WackoWiki — check requirements; older branches may need PHP 7.x or 8.x).
- - Install a database (MySQL or MariaDB) or use SQLite.
FlyEnv makes this one-click and supports multiple versions side-by-side.
1.2.2. Configure PHP
- Increase limits for uploads and posts (WackoWiki can benefit from this):
upload_max_filesize = 20M post_max_size = 20M- Set error logging:
error_log = /path/to/flyenv/logs/php/php_error.log (adjust path as needed).- Enable necessary extensions (e.g., GD, Intl, PDO, MySQLi, mbstring, etc., depending on WackoWiki version).
1.2.3. Create a Host / Virtual Site
- In FlyEnv, add a new Host (virtual host/site).
- Set Host name:
localhostor a custom domain likewackowiki.test. - Set Document Root to your WackoWiki project directory (e.g., the folder containing
wacko/or your extracted/cloned wiki files). - Enable SSL and use Auto SSL Certificates for HTTPS.
FlyEnv handles DNS resolution automatically (no manual
/etc/hosts edits).1.2.4. Web Server Specific Tweaks (Apache)
If using Apache:- Uncomment the rewrite module in the config:
#LoadModule rewrite_module lib/httpd/modules/mod_rewrite.so → remove the WackoWiki uses URL rewriting for clean links.
1.2.5. Database Setup
- Start MySQL/MariaDB via FlyEnv or use SQLite.
- Create a database for WackoWiki (e.g., via built-in tools or phpMyAdmin if installed).
- Note the credentials (usually root with a password you set).
1.2.6. Install and Configure WackoWiki
- Place your WackoWiki files in the Document Root you configured.
- Run the WackoWiki installer via browser:
https://wackowiki.test(orhttp://localhost). - Follow the installer, providing database details.
- For clean URLs, ensure
.htaccess(Apache) or equivalent Nginx config is active.
1.3. Useful Tips for WackoWiki + FlyEnv
- Logs: Check PHP error logs and web server logs directly in FlyEnv for troubleshooting.
- Ports: FlyEnv shows port usage; default Apache (80/443) or adjust as needed.
- Multiple Sites: Easily run several WackoWiki instances or other projects with different PHP versions.
- Security: For local dev only — FlyEnv is not for production. Use strong local passwords.
- Updates: Keep FlyEnv, PHP, and modules updated via the interface.
1.4. Migration from XAMPP
- Export databases from XAMPP phpMyAdmin.
- Copy
htdocscontents (your wiki files). - Import into FlyEnv's database and point a new host to the files.
1.5. Summary
- Native performance — Runs binaries directly (no virtualization overhead). Starts in milliseconds and uses far less RAM.
- Modular — Install only what you need (PHP, web server, database, etc.).
- Project isolation — Auto-switches PHP/Node versions per directory.
- Built-in conveniences — Custom
.testdomains with auto DNS, trusted SSL certificates, Mailpit for email testing, and more. - Cross-platform — Excellent Windows support (strong XAMPP alternative) plus macOS/Linux.
- Multi-version support — Easily run different PHP or database versions.
FlyEnv offers a smoother, more maintainable experience than traditional XAMPP stacks for WackoWiki development. Its GUI, native speed, and modern features (SSL, domains) reduce setup friction significantly. Start with the official installers and WackoWiki's recommended config steps for best results.
2. XAMPP
XAMPP is defunct
As for now (Feb. 2026) XAMPP can be considered as defunct, see notes[link2].XAMPP is a completely free, easy to install Apache distribution containing MariaDB, PHP, and Perl. The XAMPP open source package has been set up to be incredibly easy to install and to use.
https://www.apachefriends.org/faq_linux.html
2.1. Step 1: Download
https://www.apachefriends.org/download.htmlSimply click on one of the links below. It's a good idea to get the latest version.
A complete list of downloads (older versions) is available at SourceForge[link3].
2.2. Step 2: Installation
After downloading simply type in the following commands:Go to a Linux shell and login as the system administrator root:
su
Change the permissions to the installer
chmod 755 xampp-linux-x64-8.2.12-0-installer.run
Run the installer
./xampp-linux-x64-8.2.12-0-installer.run
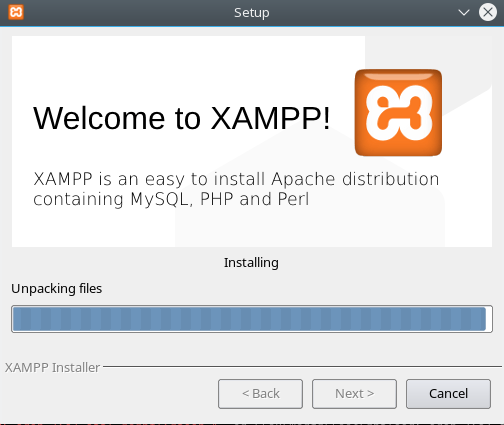
That's all. XAMPP is now installed below the
/opt/lampp directory.2.2.1. Troubleshooting
Problem starting XAMPP in OpenSUSE
The error message about netstat occurs because openSUSE has removed it from the net-tools package. It should go away if you install the packagenet-tools-deprecated. note[link4]XAMPP: Starting Apache...fail. httpd: Syntax error on line 522 of /opt/lampp/etc/httpd.conf: Syntax error on line 6 of /opt/lampp/etc/extra/httpd-xampp.conf: Cannot load modules/mod_perl.so into server: libnsl.so.1: cannot open shared object file: No such file or directory
Leap:
Additionally you need to install the package
libnsl1 manually to solve the issue.Tumbleweed:
Additionally you need to install the package
libnsl3 manually and set a symlink libnsl.so.3 → libnsl.so.1 to solve the issue. libnsl1 requires an old glibc-2.38 but Tumbleweed is already at glibc-2.41. sudo ln -s /usr/lib64/libnsl.so.3 /usr/lib64/libnsl.so.1
2.3. Step 3: Start
To start XAMPP simply call this command:/opt/lampp/lampp start
You should now see something like this on your screen:
Starting XAMPP for Linux 8.3.4-0...
LAMPP: Starting Apache...
LAMPP: Starting MySQL...
LAMPP started.
Ready. Apache and MySQL are running.
If you get any error messages please take a look at the Linux FAQ.
2.4. Step 4: Test
OK, that was easy but how can you check that everything really works? Just type in the following URL at your favorite web browser:http://localhost
Now you should see the start page of XAMPP containing some links to check the status of the installed software and some small programming examples.
2.5. A matter of security (A MUST READ!)
As mentioned before, XAMPP is not meant for production use but only for developers in a development environment. The way XAMPP is configured is to be open as possible and allowing the developer anything he/she wants. For development environments this is great but in a production environment it could be fatal.Here a list of missing security in XAMPP:
- The MySQL administrator (root) has no password.
- The MySQL daemon is accessible via network.
- ProFTPD uses the password "lampp" for user "daemon".
- PhpMyAdmin is accessible via network.
- Examples are accessible via network.
- MySQL is running under "mysql".
- Apache is running under "daemon".
To fix most of the security weaknesses simply call the following command:
/opt/lampp/lampp security
It starts a small security check and makes your XAMPP installation quite secure. For example this protects the XAMPP demo pages by a username ('lampp') and password combination.
2.6. Advanced start and stop parameters
START AND STOP PARAMETERS
| Parameter | Description |
start |
Starts XAMPP. |
stop |
Stops XAMPP. |
restart |
Stops and starts XAMPP. |
startapache |
Starts only the Apache. |
startssl |
Starts the Apache SSL support. This command activates the SSL support permanently, e.g. if you restarts XAMPP in the future SSL will stay activated. |
startmysql |
Starts only the MySQL database. |
startftp |
Starts the ProFTPD server. Via FTP you can upload files for your web server (user "nobody", password "lampp"). This command activates the ProFTPD permanently, e.g. if you restarts XAMPP in the future FTP will stay activated. |
stopapache |
Stops the Apache. |
stopssl |
Stops the Apache SSL support. This command deactivates the SSL support permanently, e.g. if you restarts XAMPP in the future SSL will stay deactivated. |
stopmysql |
Stops the MySQL database. |
stopftp |
Stops the ProFTPD server. This command deactivates the ProFTPD permanently, e.g. if you restarts XAMPP in the future FTP will stay deactivated. |
security |
Starts a small security check programm. |
For example: To start Apache with SSL support simply type in the following command (as root):
/opt/lampp/lampp startssl
You can also access your Apache server via SSL under https://localhost/.
2.7. What is where?
What is where? A big question of our existens, here are some answers! ;)IMPORTANT FILES AND DIRECTORIES
| File/Directory | Purpose |
|---|---|
| /opt/lampp/bin/ | The XAMPP commands home. /opt/lampp/bin/mysql calls for example the MySQL monitor. |
| /opt/lampp/htdocs/ | The Apache DocumentRoot directory. |
| /opt/lampp/etc/httpd.conf | The Apache configuration file. |
| /opt/lampp/etc/my.cnf | The MySQL configuration file. |
| /opt/lampp/etc/php.ini | The PHP configuration file. |
| /opt/lampp/etc/proftpd.conf | The ProFTPD configuration file. |
| /opt/lampp/phpmyadmin/config.inc.php | The phpMyAdmin configuration file. |
| /opt/lampp/logs/php_error_log | The PHP error log file. |
2.8. Setting SQL_MODE
Strict mode[link5]my.cnfsql_mode = ONLY_FULL_GROUP_BY,STRICT_TRANS_TABLES,NO_ZERO_IN_DATE,NO_ZERO_DATE,ERROR_FOR_DIVISION_BY_ZERO,NO_AUTO_CREATE_USER,NO_ENGINE_SUBSTITUTION
2.9. Enable GD and Intl extension on Windows
On XAMPP for Windows the GD and Intl extension are disabled by default, however WackoWiki requires both extensions.- Open
php.inifile (e.g.C:\xampp\php\php.ini). - Search for
;extension=gdand;extension=intl. - Remove
;from both then restart the Apache server.
2.10. Stopping XAMPP
To stop XAMPP simply call this command:/opt/lampp/lampp stop
You should now see:
Stopping XAMPP for Linux 8.3.4-0...
LAMPP: Stopping Apache...
LAMPP: Stopping MySQL...
LAMPP stopped.
And XAMPP for Linux is stopped.
2.11. Uninstall
To uninstall XAMPP just type in this command:keeping htdocs and databases
./uninstall
or entirely
rm -rf /opt/lampp
2.12. Enable or Disable Mode Rewrite
httpd.conf (/opt/lampp/etc/httpd.conf)ON
LoadModule rewrite_module modules/mod_rewrite.so
OFF
#LoadModule rewrite_module modules/mod_rewrite.so
2.13. Setting Up Virtual Hosts
http://wiki/http://wiki.localhost/-> Running more than one web site on a single machine[link6]
2.14. Create a symbolic link to htdocs
Create a symbolic link between a directory which you have read and write permissions in with htdocs.sudo ln -s /home/USERNAME/git/project /opt/lampp/htdocsand enter root password when prompted.
Or use drag and drop in your favorite file manager to create a symbolic link.
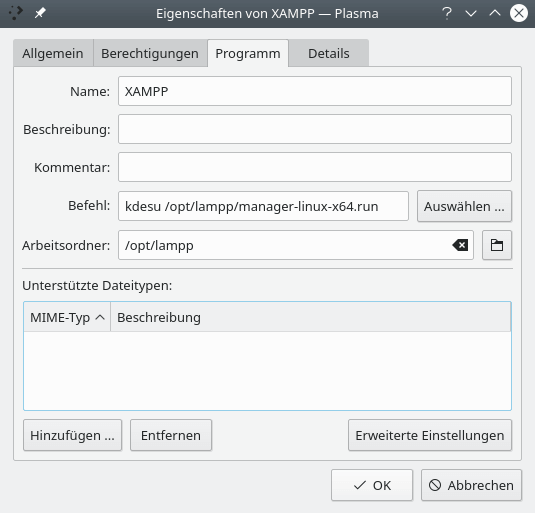
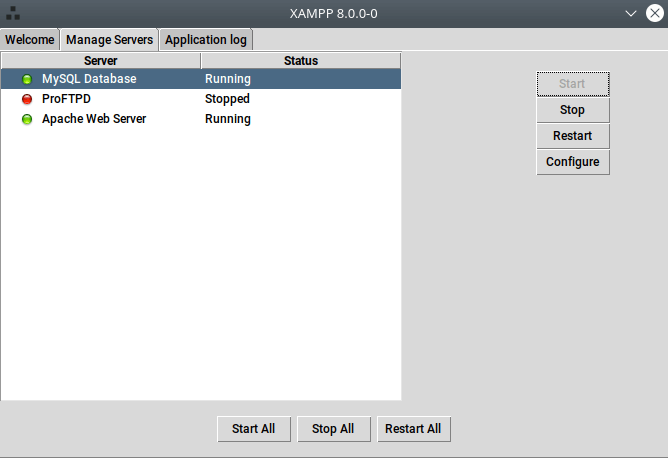
2.15. Create a shortcut link to manager-linux-x64.run
KDE:kdesu /opt/lampp/manager-linux-x64.run
- [link1] https://github.com/xpf0000/FlyEnv
- [link2] https://github.com/ApacheFriends/xampp-build/issues/40#issuecomment-2505346194
- [link3] https://sourceforge.net/projects/xampp/files/
- [link4] https://community.apachefriends.org/f/viewtopic.php?f=17&t=83113
- [link5] https://wackowiki.org/doc/Dev/Guidelines/SQL/SQLmodes
- [link6] https://wackowiki.org/doc/Org/Tools/Hosting/TestServer/SettingUpVirtualHosts